Microsoft’s Windows OS holds more than 90% of the PC market share. And honestly, it shouldn’t be surprising because of the fact that millions of application’s & games are available for the platform, it’s no wonder that most people prefer Windows OS. It’s not all sunshine though, being the most popular OS also means that viruses will ruin your day. And thanks to the internet it’s much easier for your PC to get infected, it gets more horrible when you consider the fact that you’re living in the era where almost everyone uses internet. Of course it’s not because Windows is less secure than Mac or Linux, it’s simply because of Windows popularity. Since Windows OS is so popular, most people tend to make hackwares/viruses for Windows instead of other OS’es. And once you’ve started using Windows OS, it’s performance will gradually start decreasing to the point that your Windows PC might not even be able to boot. Surely none of us would like to face this kind of situation.

Fortunately there are some really nice people on the earth, who have created some incredibly useful Software’s to help you keep your PC clean.
How To Keep Your Windows PC Clean
There are so many software’s that can help you with the PC-Cleaning task, however, I will recommend you to use the one’s I mention because they are simply better than others. Please note that it doesn’t matter what Windows you are using, because most if not all things are going to be the same. So if even if you use the unsupported Windows XP, you’ll still be able to do all of these things.
Before starting, download this file from here. These are some of the tools/software’s you’ll need. It’s compressed so you’ll need to extract it. You can use WinZip, WinRAR or 7-zip for this purpose. I’d recommend 7-zip, since it’s completely free. So download and install any of the mentioned softeware, and extract the “PC maintenance tool” folder somewhere on your desktop.
Install the software’s within the folder. There is absolutely no virus in them. So just install them and read the instructions.
Once done, then you can move on to the good stuff.
1: Keep your PC up-to-date
Most of us don’t even bother with the Windows update thing. However, it is extremely important to update your PC, because this way you not only get new features but also the patches and fixes for the security loop-holes in the OS.
To do this open Start Menu and type “Windows Update” (Press Windows+S together if you are on Windows 8, also you might wanna check out my guide on how to make Windows 8 look like Windows 7).

You can turn on automatic updates by going into the “Change Settings” section.
2: Defrag your Hard Drive’s
Hard Drive’s are like the back bone of the CPU, because everything is stored on them and as the time passes their performance decreases. This can lead to frequent System-Crashes and if your are really unlucky than the rare Data Loss. To avoid this it is very important to perform defragmentation of your Hard Drive’s. You can use Windows own Defragger for this purpose which you can open by right-clicking on your Drive and opening the “Tools” section.
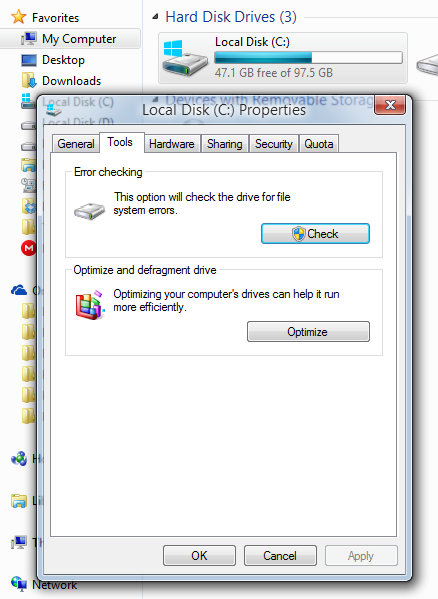
Even though the built-in tool works just fine, some people may find it painfully slow. So I’d recommend using Auslogics Disk Defrag. It’s much better and faster than the built-in Windows defragger.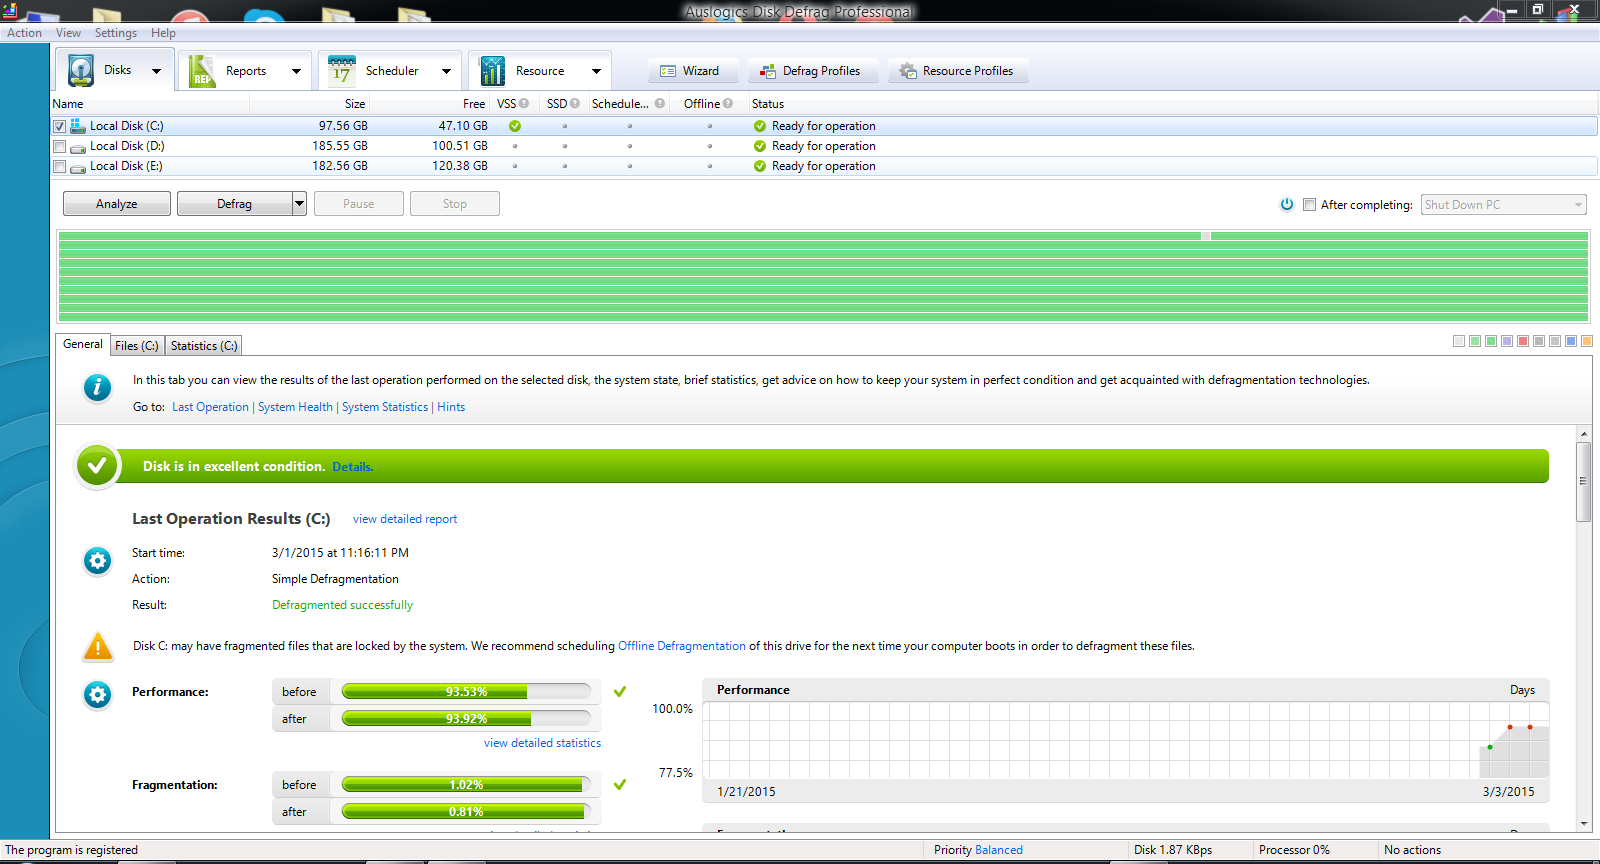
Pro Tips:
- Defrag your Drive’s daily
- Optimize them once a week
- Check for errors before defragging or optimizing Hard Drive’s
- Don’t use your PC while defragmentation/optimization is in process
- Use Auslogics Boot time optimization for more effective optimization of the Drive.
You can use Auslogics Disk Defrag to check and eliminate errors, but I recommend using CMD for this purpose. To eliminate errors using CMD, open an elevated command prompt. To do this, open Start Menu (Windows 8 users need to press Windows Key+S together, or go to Charm Bar and select the Search Icon) and type “cmd” right-click on it and hit “Run as administrator” after that type in “CHKDSK” and hit Enter. You might have to reboot your PC to complete the process.

3: Remove unnecessary programs
Sometimes when you a download/install something from the non-authentic source, there is a good chance that you’ll also download some sort of malicious program with it, and which then installs other programs without your permission. This can lead to serious problems like system lag, data corruption, loss of internet and whatnot. To remove them you can use Built In Windows uninstaller, but I’d recommend CCleaner or even better Should I Remove it?, it is a free software so download and install it. Basically it helps you find out what applications are adware/bloatware/crapware. I highly recommend using it if you are not sure what to remove.

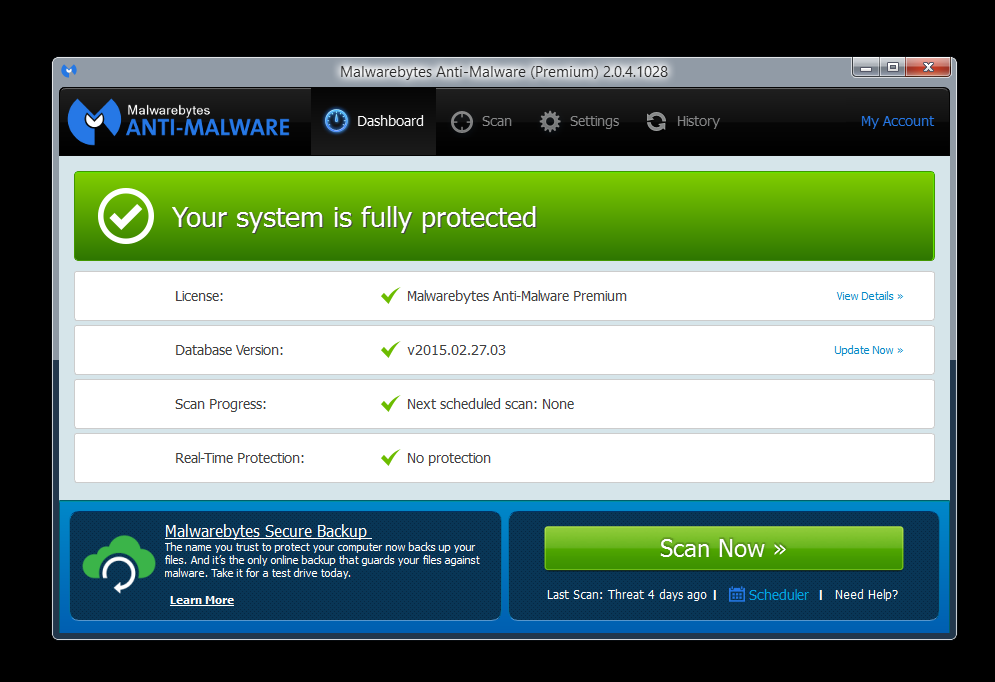
Uninstall any software that you don’t use. To remove malware items, I recommend using Malwarebytes. Scan your PC using Malwarebytes and remove items it detects.
4: Disable unnecessary start-up items
Disabling unnecessary start-up items can greatly reduce your PC boot time. So disable everything you think you don’t need at start-up of Windows.
To do this, go to Start Menu (Windows key+S for Windows 8 users) and type “msconfig” without quotes and hit Enter. A Windows will open, go select the “Services” Tab and Check the ‘Hide all Microsoft Services” option in the lower left bottom of the Window. Now disable every unnecessary service.
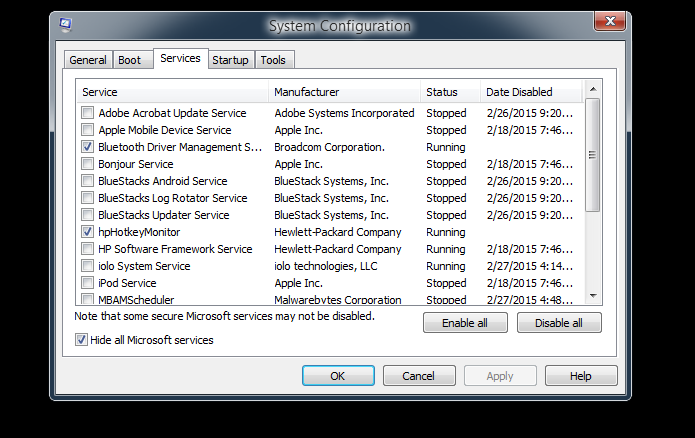
Once done, go to the “Startup” tab and click on “Open Task Manager” and then disable unnecessary startup items.
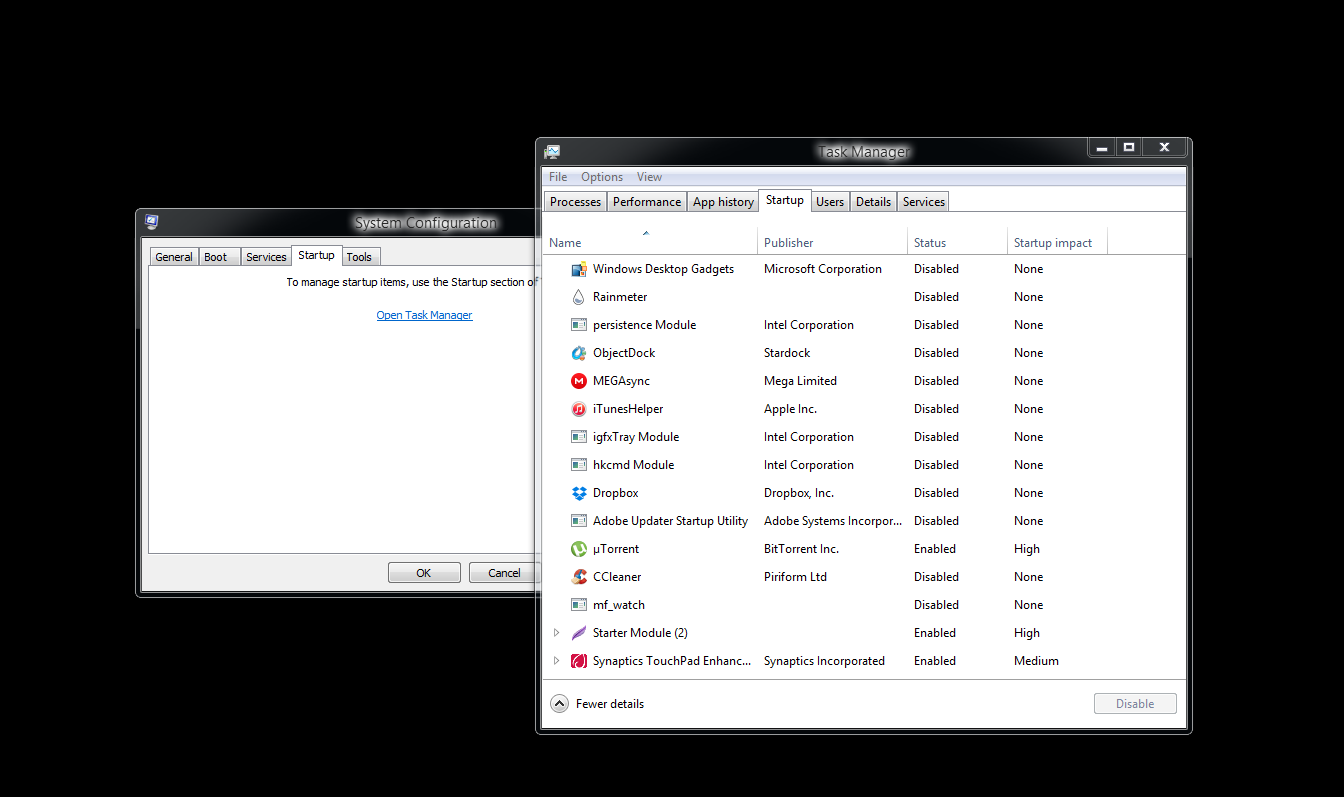
Once done, just close the Task Manager using the close button and click on the “OK” button on the msconfig Windows, it will ask you to restart, so just click Restart Now.
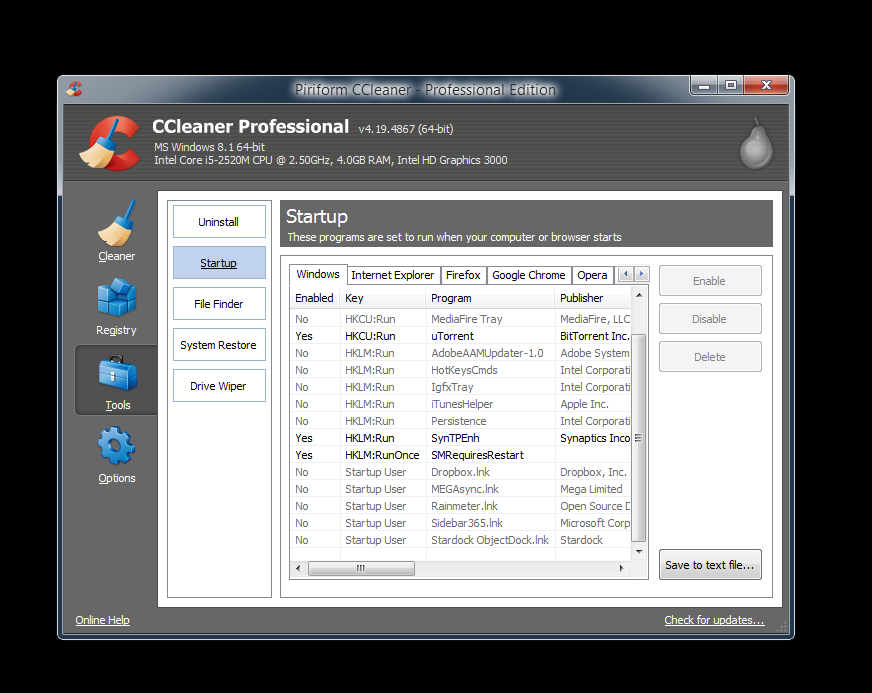
You can also use CCleaner for this job, as it gives you deep access to startup items, for example you can turn off Startup browser extension using it.
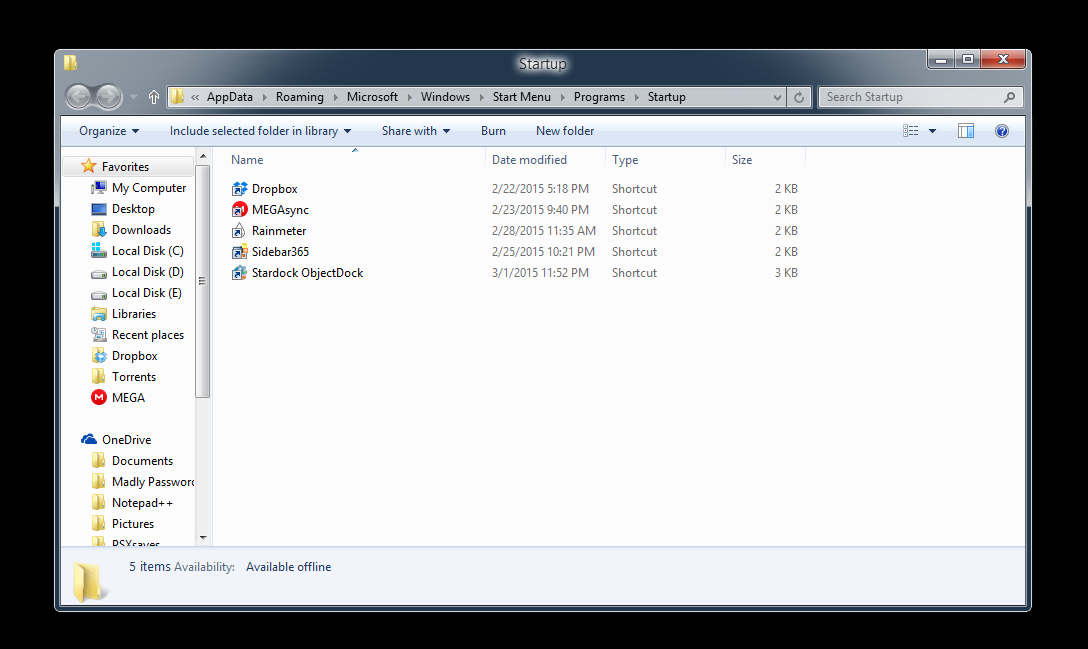
You should also remove start-up items from “Startup ” folder. To do this open Start Menu (Windows 8 users need to press Windows Key+S together, or open charms and select the “Search Icon”) and type “run” and hit Enter. Now type “shell:startup”, and click OK.

A new Explorer Windows will open, and there you’ll be able to see all the programs that start when you boot your Windows, delete all the unnecessary shortcuts from the folder.
5: Clean up junk from your PC
When you use Windows, it stores a lot of Junk and Temporary data. This can be removed using CCleaner.
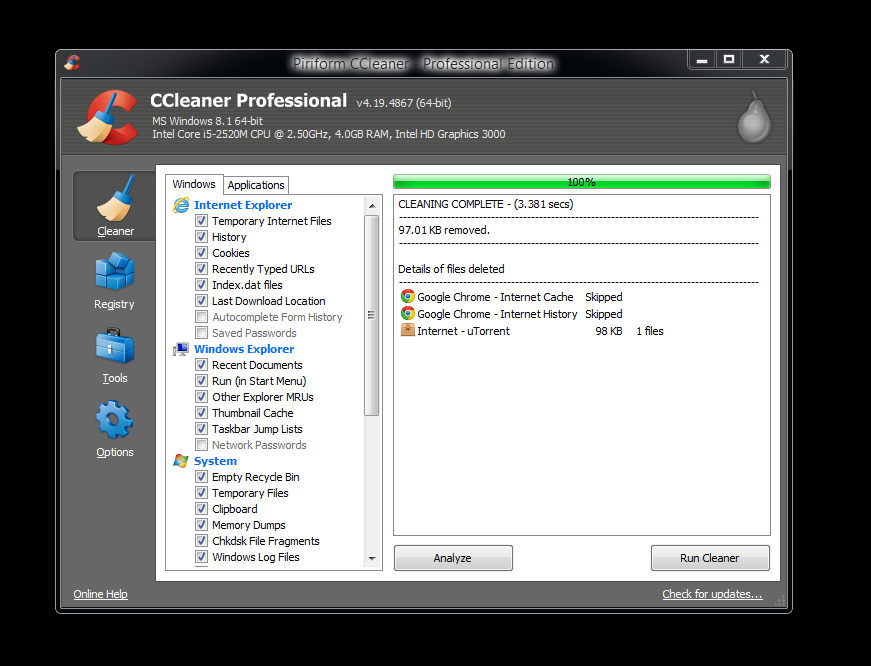
So make a habit of using this application more often. Sadly CCleaner has it’s own limitations and can’t remove all the useless junk, like Windows Update leftover data. To remove this type of data, use Windows built-in Disk Cleanup utility.
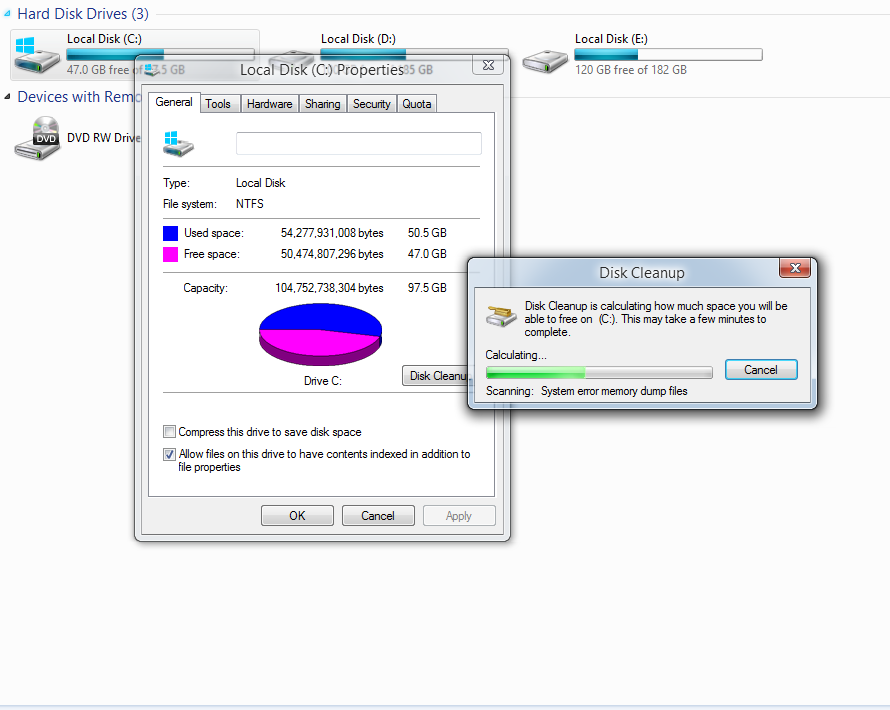
Open My Computer and right-click on the drive you want to clean and select “Disk Cleanup” once done, it will scan files and than a new Windows will open, click on the “Cleanup System Files” on this Windows. It will scan again then it will open a Windows where you can select what to clean. Check Windows Update, Temporary Data, Old Windows Installation and Old Prefetch data. I’m naming these stuff, because CCleaner can’t delete them. It can take a while so leave your PC until it’s done.
6: Clean Registry Errors
When you install and uninstall lot of programs, your registry will become cluttered. While not the main cause, but this can play a role in slowing down your PC. So cleanup your registry using CCleaner.
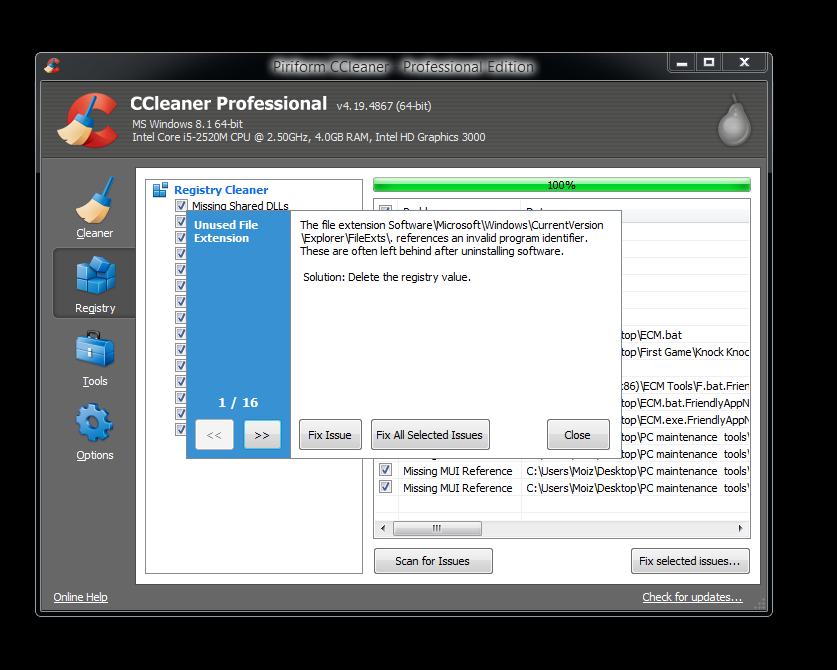
Open CCleaner, go to Registry Tab and click on “Scan For Issues” wait for it to complete and then click on “Fix Selected Issues” it will ask you to backup, click on “Yes” and save the backup of the registry somewhere in your Hard Drive, just in case it deletes something important.
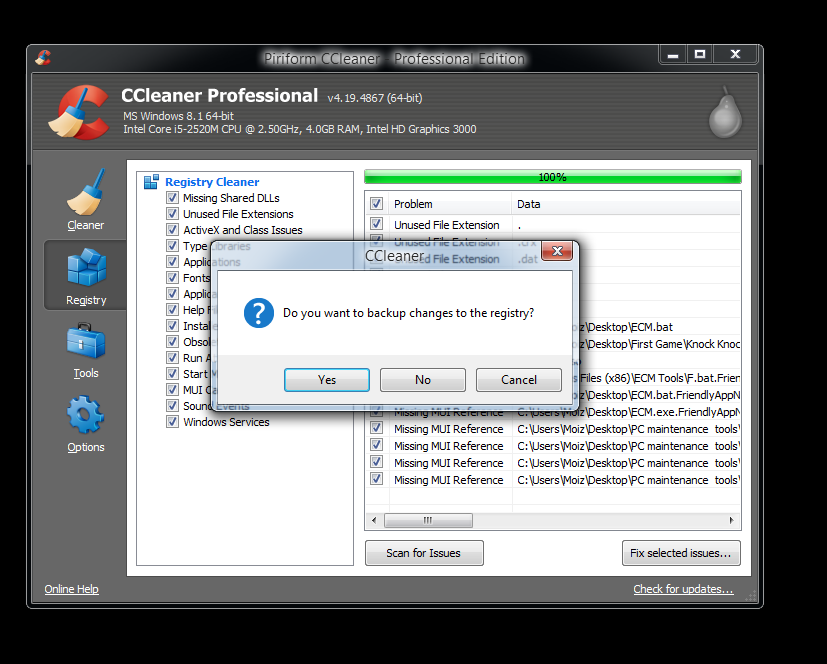
Once you have created the backup click on “Fix Selected Issues” to clean your registry.
Clean your Registry every week using CCleaner, or you can try Auslogics Registry Cleaner, personally I never had any problems with CCleaner.
7: Get Rid of the viruses
Now comes the final and perhaps the most important step, virus removing. Virus can literally destroy your PC. Thankfully Windows comes with built-in antivirus, Windows Defender. Which is more than enough for people who don’t download much and do their regular Office work. However, for those who download a lot of stuff might need a better software. There are numbers of free Antivirus’s out there including, but not limited to;
- avast! FREE Antivirus
- AVG Free Antivirus
- Bitdefender Antivirus FREE Edition
- Panda Free Antivirus
- Norton Antivirus (30-Day Trial)
Honestly, it comes down to your personal preference, all of them are great. I personally use avast! Pro Antivirus. It has lots of great options like Firewall, Sandbox, Web Shield e.t.c
For now we will use Windows Defender, because it is actually pretty good.
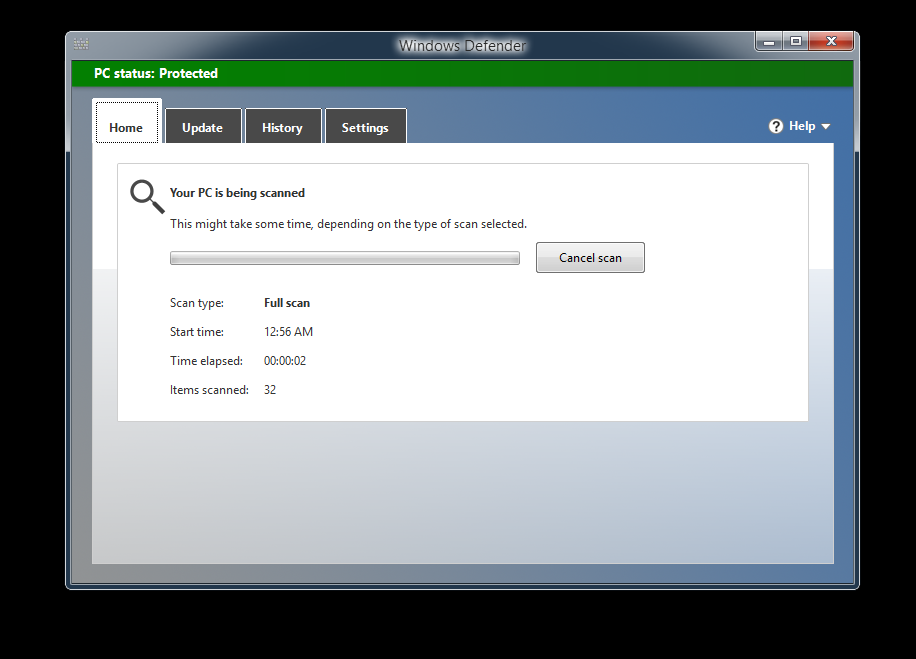
I’d recommend doing a Full System Scan. Once done, remove everything malicious or harmful. You should scan your PC every 2-3 days.
That’s it Guys, these are the basic things to keep your Windows PC well-maintained. But honestly it’s more than that, you have to be careful about what you download. Don’t just download straight away, I’d also recommend staying away from download that needs survey’s because more often than not, they will give you some kind of bad virus/malware. Before installing something make sure it’s from a trusted source. Make a System Restore Point every now and then, just so you are prepared for the worst case scenarios. If your PC is too hot, shut it down and give it some time to cool down.
I’d also recommends using System Mechanic, they have a free version and it’s actually pretty good. It offers a wide array of tools that can help you keep your PC maintained. So I’d highly recommend you to give it a try.
But in the end, it all comes down to you. Because the more you care about your PC, the better your PC will perform.
If you have any question, ask them in the comment section below.
Know something that I don’t? Know something that should be added to this tutorial? Want to share some tips? Whatever it is, sound off below and let me know.